Knowledge
- Compare and contrast virtual and physical hardware resources
- Identify VMware memory management techniques
- Identify VMware CPU load balancing techniques
- Identify pre-requisites for Hot Add features
Skills and Abilities
- Tune Virtual Machine memory configurations
- Tune Virtual Machine networking configurations
- Tune Virtual Machine CPU configurations
- Tune Virtual Machine storage configurations
- Calculate available resources
- Properly size a Virtual Machine based on application workload
- Modify large memory page settings
- Understand appropriate use cases for CPU affinity
-
Configure alternate virtual machine swap locations
Tune Virtual Machine memory configurations
Official Documentation:
vSphere Virtual Machine Administration, Chapter 8 “Configuring Virtual Machines”, Section “Virtual Machine memory Configuration”, page 104.
You can add, change, or configure virtual machine memory resources or options to enhance virtual machine performance. You can set most of the memory parameters during virtual machine creation or after the guest operating system is installed. Some actions require that you power off the virtual machine before changing the settings.
Memory resource configuration is distinct from the virtual hardware memory size, which you configure on the Hardware tab. The memory resource setting determines how much of the host’s memory is allocated to a virtual machine. The virtual hardware memory size determines how much memory applications that are running inside the virtual machine have available to them. A virtual machine cannot benefit from more memory resources than its configured virtual hardware memory size. The ESXi host caps memory resource use to the maximum useful for the virtual machine, so you can accept the default of Unlimited memory resources.
Change the Memory Configuration
You can reconfigure the memory allocated to a virtual machine.
Minimum memory size is 4MB for virtual machines that use BIOS firmware. Virtual machines that use EFI firmware require at least 96MB of RAM or they cannot power on.
Maximum memory size for a virtual machine depends on the host’s physical memory and the virtual machine’s hardware version.
If the virtual machine memory is greater than the host memory size, swapping occurs, which can have a severe effect on virtual machine performance. The memory size must be a multiple of 4MB. The maximum for best performance represents the threshold above which the host’s physical memory is insufficient to run the virtual machine at full speed. This value fluctuates as conditions on the host change, for example, as virtual machines
are powered on or off.
| Introduced in Host Version | Virtual Machine Version | Maximum Memory Size |
| ESXi 5.0 | 8 | 1011GB |
| ESX/ESXi 4.x | 7 | 255GB |
| ESX/ESXi 3.x | 4 | 65,532MB |
The ESXi host version indicates when support began for the increased memory size. For example, the memory size of a version 4 virtual machine running on ESXi 5.0 is restricted to 65,532MB.
Allocate Memory Resources
You can change the amount of memory resources allocated to a virtual machine by using the shares, reservations, and limits settings.
The following user-defined settings affect the memory resource allocation of a virtual machine.
| Limit | Places a limit on the consumption of memory for a virtual machine. This value is expressed in megabytes. |
| Reservation | Specifies the guaranteed minimum allocation for a virtual machine. The reservation is expressed in megabytes.If the reservation cannot be met, the virtual machine will not power on. |
| Shares | Each virtual machine is granted a number of memory shares. The more sharesa virtual machine has, the greater share of host memory it receives. Sharesrepresent a relative metric for allocating memory capacity. For moreinformation about share values, see the vSphere Resource Managementdocumentation. |
Assigning a virtual machine a reservation larger than its configured memory is wasteful. The vSphere Client or the Web Client does not allow you to make such an assignment on the Resources tab. If you give a virtual machine a large reservation and then reduce its configured memory size on the Hardware tab, the reservation is reduced to match the new configured memory size. You must power off the virtual machine before configuring memory resources.
Change Memory Hot Add Settings
Memory hot add lets you add memory resources for a virtual machine while the machine is powered on.
Enabling memory hot add produces some extra memory overhead on theESXi host for the virtual machine.
Prerequisites
- The virtual machine has a guest operating system that supports Memory hot add functionality.
- The virtual machine is using hardware version 7 or later.
- VMware Tools is installed.
Procedure
- In the vSphere Client inventory, right-click the virtual machine and select Edit Settings.
- Click the Options tab and under Advanced, select Memory/CPU Hotplug.
-
Enable or disable memory hot add.
- Enable memory hot add for this virtual machine.
- Disable memory hot add for this virtual machine.
- Enable memory hot add for this virtual machine.
- Click OK to save your changes and close the dialog box.
Associate Memory Allocation with a NUMA Node
You can specify that all future memory allocations on a virtual machine use pages associated with a single NUMA node. The NUMA code is also known as manual memory affinity. When the virtual machine uses local memory, the performance improves on that virtual machine.
The following conditions apply to memory optimization with NUMA:
- The NUMA option is available only if the host uses NUMA memory architecture.
- Affinity settings are meaningful only when used to modify the performance of a specific set of virtual machines on one host. This option is not available when the virtual machine resides on a DRS cluster. All affinity values are cleared when you move the virtual machine to a new host.
- You can specify nodes to use for future memory allocations only if you also specified CPU affinity. If you make manual changes only to the memory affinity settings, automatic NUMA rebalancing does not work properly.
- Checking all the boxes is the same as applying no affinity.
Procedure
- In the vSphere Client inventory, right-click the virtual machine and select Edit Settings.
- Select the Resources tab, and select Memory.
-
In the NUMA Memory Affinity panel, set the NUMA node affinity for the virtual machine.
- No affinity
- Use memory from nodes
- No affinity
- Click OK to save your changes and close the dialog box.
Tune Virtual Machine networking configurations
vSphere Virtual Machine Administration, Chapter 8 “Configuring Virtual Machines”, Section “Network Virtual Machine Configuartion”, page 111.
Network Virtual Machine Configuration
ESXi networking features provide communication between virtual machines on the same host, between virtual machines on different hosts, and between other virtual and physical machines. The networking features also allow management of ESXi hosts and provide communication between VMkernel services (NFS, iSCSI, or vSphere vMotion) and the physical network. When you configure networking for a virtual machine, you select or change an adapter type, a network connection, and whether to connect the network when the virtual machine powers on.
Network Adapter Types
When you configure a virtual machine, you can add network adapters (NICs) and specify the adapter type.
The type of network adapters that are available depend on the following factors:
- The virtual machine version, which depends on what host created it or most recently updated it.
- Whether the virtual machine has been updated to the latest version for the current host.
- The guest operating system.
The following NIC types are supported:
| E1000 | Emulated version of the Intel 82545EM Gigabit Ethernet NIC, with driversavailable in most newer guest operating systems, including Windows XP andlater and Linux versions 2.4.19 and later. |
| Flexible | Identifies itself as a Vlance adapter when a virtual machine boots, but initializesitself and functions as either a Vlance or a VMXNET adapter, depending onwhich driver initializes it. With VMware Tools installed, the VMXNET driverchanges the Vlance adapter to the higher performance VMXNET adapter. |
| Vlance | Emulated version of the AMD 79C970 PCnet32 LANCE NIC, an older 10 MbpsNIC with drivers available in most 32bit guest operating systems exceptWindows Vista and later. A virtual machine configured with this networkadapter can use its network immediately. |
| VMXNET | Optimized for performance in a virtual machine and has no physicalcounterpart. Because operating system vendors do not provide built-in driversfor this card, you must install VMware Tools to have a driver for the VMXNETnetwork adapter available. |
| VMXNET 2 (Enhanced) | Based on the VMXNET adapter but provides high-performance featurescommonly used on modern networks, such as jumbo frames and hardwareoffloads. VMXNET 2 (Enhanced) is available only for some guest operatingsystems on ESX/ESXi 3.5 and later. |
| VMXNET 3 | Next generation of a paravirtualized NIC designed for performance. VMXNET3 offers all the features available in VMXNET 2 and adds several new features,such as multiqueue support (also known as Receive Side Scaling in Windows),IPv6 offloads, and MSI/MSI-X interrupt delivery. VMXNET 3 is not related toVMXNET or VMXNET 2. |
Network Adapters and Legacy Virtual Machines
Legacy virtual machines are virtual machines that are supported by the product in use, but are not current for that product. The default network adapter types for all legacy virtual machines depend on the adapters available and compatible to the guest operating system and the version of virtual hardware on which the virtual machine was created.
If you do not upgrade a virtual machine to correspond with an upgrade to a newer version of an ESXi host, your adapter settings remain unchanged. If you upgrade your virtual machine to take advantage of newer virtual hardware, your default adapter settings will likely change to be compatible with the guest operating system and upgraded host hardware.
To verify the network adapters that are available to your supported guest operating system for a particular version of vSphere ESXi, see the VMware Compatibility Guide.
Change the Virtual Network Adapter (NIC) Configuration
You can change the power-on connection setting, the MAC address, and the network connection for the virtual network adapter configuration for a virtual machine.
Prerequisites
Required Privileges:
- Virtual machine.Configuration.Modify device settings for editing the MAC address and network.
- Virtual machine.Interaction.Device connection for changing Connect and Connect at power on.
- Network.Assign network
Procedure
- In the vSphere Client inventory, right-click the virtual machine and select Edit Settings.
- Click the Hardware tab and select the appropriate NIC in the Hardware list.
- (Optional) To connect the virtual NIC when the virtual machine is powered on, select Connect at power on.
- (Optional) Click the blue information icon under DirectPath I/O to view details regarding the virtual NIC’s DirectPath I/O status and capability.
- Select an option for MAC address configuration.
| Option | Description |
| Automatic | vSphere assigns a MAC address automatically. |
| Manual | Type the MAC address to use. |
- Configure the Network Connection for the virtual NIC.
| Option | Description |
| Standard settings | The virtual NIC connects to a standard or distributed port group. Select theport group for the virtual NIC to connect to from the Network label dropdownmenu. |
| Advanced settings | The virtual NIC connects to a specific port on a vSphere distributed switch.This option appears only when a vSphere distributed switch is available.
|
- Click OK to save your changes and close the dialog box.
Add a Network Adapter to a Virtual Machine
When you add a network adapter (NIC) to a virtual machine, you select the adapter type, network connection, and whether the device should connect when the virtual machine is powered on.
Procedure
- In the vSphere Client inventory, right-click the virtual machine and select Edit Settings.
- Click the Hardware tab and click Add.
- Select Ethernet Adapter, and click Next.
- Select an adapter type from the drop-down menu.
- In the Network connection panel, select either a named network with a specified label or a legacy network.
- To connect the virtual NIC when the virtual machine is powered on, select Connect at power on.
- Click Next.
- Review your selections and click Finish.
- Click OK to save your changes and close the dialog box.
Tune Virtual Machine CPU configurations
Official Documentation:
vSphere Virtual Machine Administration, Chapter 8 “Configuring Virtual Machines”, Section “Virtual CPU Configuartion”, page 92.
Virtual CPU Configuration
You can add, change, or configure CPU resources to improve virtual machine performance. You can set most of the CPU parameters during virtual machine creation or after the guest operating system is installed. Some actions require you to power off the virtual machine before changing the settings.
VMware uses the following terminology. Understanding these terms can help you plan your CPU resource allocation strategy.
| CPU | The CPU or processor is the portion of a computer system that carries out theinstructions of a computer program and is the primary element carrying outthe computer’s functions. CPUs contain cores. |
| CPU Socket | A physical connector on a computer motherboard that accepts a single physicalCPU. Many motherboards can have multiple sockets that can in turn acceptmulticore processors (CPUs). The vSphere Client computes the total numberof cores to give the virtual machine from the number of virtual sockets andcores per socket that you select. The vSphere Web Client computes the total
number of virtual sockets from the number of cores and cores per socket that you select. |
| Core | Comprises a unit containing an L1 cache and functional units needed to runprograms. Cores can independently run programs or threads. One or morecores can exist on a single CPU. |
| Corelet | An AMD processor corelet is architecturally equivalent to a logical processor.Certain future AMD processors will comprise a number of compute units,where each compute unit has a number of corelets. Unlike a traditionalprocessor core, a corelet lacks a complete set of private, dedicated executionresources. It shares some execution resources with other corelets such as an L1
Instruction Cache or a floating-point execution unit. AMD refers to corelets as cores, but because these are unlike traditional cores, VMware uses the nomenclature of “corelets” to make resource sharing more apparent. |
| Thread | Some cores can run independent streams of instructions simultaneously. Inexisting implementations, cores can run one or two software threads at onetime by multiplexing the functional units of the core between the softwarethreads, as necessary. Such cores are called dual or multithreaded. |
| Resource sharing | Shares specify the relative priority or importance of a virtual machine orresource pool. If a virtual machine has twice as many shares of a resource asanother virtual machine, it is entitled to consume twice as much of that resourcewhen these two virtual machines are competing for resources. |
| Resource allocation | You can change CPU resource allocation settings, such as shares, reservation,and limit, when available resource capacity does not meet demands. Forexample, if at year end the workload on accounting increases, you can increasethe accounting resource pool reserve. |
| vSphere VirtualSymmetricMultiprocessing (VirtualSMP) | Feature that enables a single virtual machine to have multiple cores. |
Virtual CPU Limitations
The maximum number of virtual CPUs that you can assign to a virtual machine depends on the number of logical CPUs on the host, the host license, and the type of guest operating system that is installed on the virtual machine.
Be aware of the following limitations:
- A virtual machine cannot have more virtual CPUs than the number of logical cores on the host. The number of logical cores is equal to the number of physical cores if hyperthreading is disabled or two times that number if hyperthreading is enabled.
- Not every guest operating system supports Virtual SMP, and some that do require reinstallation if the number of CPUs changes. For more information about using Virtual SMP, search the VMware Knowledge Base.
- Guest operating systems that support Virtual SMP might support fewer processors than are available on the host. For information about Virtual SMP support, see the VMware Compatibility Guide.
- Running Virtual SMP virtual machines on hyperthreaded hosts with Virtual SMP can affect virtual machine performance. Running uniprocessor virtual machines on hyperthreaded hosts can also affect virtual machine performance.
Configuring Multicore Virtual CPUs
VMware multicore virtual CPU support lets you control the number of cores per virtual socket in a virtual machine. This capability lets operating systems with socket restrictions use more of the host CPU’s cores, which increases overall performance.
IMPORTANT When you configure your virtual machine for multicore virtual CPU settings, you must ensure that your configuration complies with the requirements of the guest operating system EULA.
Using multicore virtual CPUs can be useful when you run operating systems or applications that can take advantage of only a limited number of CPU sockets. Previously, each virtual CPU was, by default, assigned to a single-core socket, so that the virtual machine would have as many sockets as virtual CPUs.
You can configure a virtual machine that runs on an ESXi host to have up to 32 virtual CPUs. A virtual machine cannot have more virtual CPUs than the actual number of logical CPUs on the host. The number of logical CPUs is the number of physical processor cores or two times that number if hyperthreading is enabled. For example, if a host has 32 logical CPUs, you can configure the virtual machine for 32 virtual CPUs.
You configure how the virtual CPUs are assigned in terms of sockets and cores. For example, you can configure a virtual machine with 12 virtual CPUs in the following ways:
- 12 virtual sockets with 1 core per socket
- 6 virtual sockets with 2 cores per socket
- 4 virtual sockets with 3 cores per socket
- 3 virtual sockets with 4 cores per socket
- 2 virtual sockets with 6 cores per socket
- 1 virtual socket with 12 cores per socket
For multicore CPUs, the host must have a license for Virtual SMP.
For more information about multicore CPUs, see the vSphere Resource Management documentation. You can also search the VMware Knowledge Base for articles about multicore CPUs.
Change CPU Hot-Plug Settings
The CPU hot plug option lets you add CPU resources for a virtual machine while the machine is powered on.
The following conditions apply:
- For best results, use hardware version 8 virtual machines.
- Hot-adding multicore virtual CPUs is supported only with hardware version 8 virtual machines.
- Not all guest operating systems support CPU hot add. You can disable these settings if the guest is not supported.
- To use the CPU hot-add feature with hardware version 7 virtual machines, set Number of cores per socket to 1.
- Adding CPU resources to a running virtual machine with CPU hot plug enabled disconnects and reconnects all USB passthrough devices connected to that virtual machine.
Prerequisites
- Verify that the virtual machine is running under the following conditions:
- VMware Tools is installed. This condition is required for hot plug functionality with Linux guest operating systems.
- The virtual machine has a guest operating system that supports CPU hot plug.
- The virtual machine is using hardware version 7 or later.
- The virtual machine is powered off.
- Required privileges: Virtual Machine.Configuration.Settings on the virtual machine
Procedure
- In the vSphere Client inventory, right-click the virtual machine and select Edit Settings.
- Click the Options tab and under Advanced, select Memory/CPU Hotplug.
- Change the CPU Hot Plug setting.
- Click OK to save your changes and close the dialog box.
What to do next
You can now add CPUs to the powered on virtual machine.
Change the Number of Virtual CPUs
You can configure a virtual machine that runs on an ESXi host to have up to 32 virtual CPUs. You can change the number of virtual CPUs while the virtual machine is running or powered off.
Virtual CPU hot add is supported for virtual machines with multicore CPU support that are running on hardware version 8 or later. When the virtual machine is powered on, and CPU hot add is enabled, you can hot add virtual CPUs to the running virtual machine. You can add only multiples of the number of cores per socket. For multicore CPUs, the host must have a license for vSphere Virtual Symmetric Multiprocessing (Virtual SMP).
IMPORTANT When you configure your virtual machine for multicore virtual CPU settings, you must ensure that your configuration complies with the requirements of the guest operating system EULA.
Prerequisites
- If CPU hot add is not enabled, power off the virtual machine before adding CPUs.
- If CPU hot remove is not enabled, power off the virtual machine before removing CPUs.
- To hot add multicore CPUs, verify that the virtual machine has hardware version 8.
- Required privilege: Virtual Machine.Configuration.Change CPU Count on the virtual machine
Procedure
- In the vSphere Client inventory, right-click the virtual machine and select Edit Settings.
- Click the Hardware tab and select CPUs.
- Select a value from the Number of virtual sockets drop-down menu.
- Select a value from the Number of cores per socket drop-down menu.
The resulting total number of cores is a number equal to or less than the number of logical CPUs on the host.
- Click OK to save your changes and close the dialog box.
Allocate CPU Resources
You can change the amount of CPU resources allocated to a virtual machine by using the shares, reservations, and limits settings.
A virtual machine has the following user-defined settings that affect its CPU resource allocation.
| Limit | Places a limit on the consumption of CPU time for a virtual machine. This valueis expressed in MHz. |
| Reservation | Specifies the guaranteed minimum allocation for a virtual machine. Thereservation is expressed in MHz. |
| Shares | Each virtual machine is granted a number of CPU shares. The more shares avirtual machine has, the more often it gets a time slice of a CPU when there isno CPU idle time. Shares represent a relative metric for allocating CPUcapacity. |
Prerequisites
Required Privilege: Virtual machine.Configuration.Change resource
Procedure
- In the vSphere Client inventory, right-click the virtual machine and select Edit Settings.
- Click the Resources tab and select CPU.
- Allocate the CPU capacity for this virtual machine.
| Limit | Places a limit on the consumption of CPU time for a virtual machine. This valueis expressed in MHz. |
| Reservation | Specifies the guaranteed minimum allocation for a virtual machine. Thereservation is expressed in MHz. |
| Shares | Each virtual machine is granted a number of CPU shares. The more shares avirtual machine has, the more often it gets a time slice of a CPU when there isno CPU idle time. Shares represent a relative metric for allocating CPUcapacity. |
- Click OK to save your changes and close the dialog box.
Configuring Advanced CPU Scheduling Settings
You can select CPU options that involve scheduling the virtual machine processing to physical processor cores and hyperthreads. ESXi generally manages processor scheduling well, even when hyperthreading is enabled.
These settings are useful only for detailed tweaking of critical virtual machines.
Configure Hyperthreaded Core Sharing
You can select how the virtual CPUs of a virtual machine share physical cores on a hyperthreaded system.
Hyperthreading technology allows a single physical processor to behave like two logical processors. The hyperthreaded core sharing option provides detailed control over whether to schedule a virtual machine to share a physical processor core. The processor can run two independent applications at the same time.
Although hyperthreading does not double the performance of a system, it can increase performance by better utilizing idle resources.
Prerequisites
The hyperthreaded core sharing option must be enabled in your system’s BIOS settings. For more information, see the Resource Management documentation.
Power off the virtual machine.
Procedure
- In the vSphere Client inventory, right-click the virtual machine and select Edit Settings.
- Click the Resources tab and select Advanced CPU.
- Select a mode from the Hyperthreading Sharing Mode drop-down menu.
| Option | Description |
| Any (default) | The virtual CPUs of this virtual machine can share cores with other virtualCPUs of this or other virtual machines. |
| None | The virtual CPUs of this virtual machine have exclusive use of a processorcore whenever they are scheduled to it. The other hyperthread of the core ishalted while this virtual machine is using the core. |
| Internal | On a virtual machine with exactly two virtual processors, the two virtualprocessors are allowed to share one physical core (at the discretion of thehost scheduler), but this virtual machine never shares a core with any othervirtual machine. If this virtual machine has any other number of processorsother than two, this setting is the same as the None setting. |
- Click OK to save your changes and close the dialog box.
Click OK to save your changes and close the dialog box.
The Scheduling Affinity option gives you detailed control over how virtual machine CPUs are distributed across the host’s physical cores (and hyperthreads if hyperthreading is enabled). This panel does not appear for virtual machines in a DRS cluster or when the host has only one processor core and no hyperthreading.
Using CPU affinity, you can assign a virtual machine to a specific processor. This assignment allows you to restrict the assignment of virtual machines to a specific available processor in multiprocessor systems.
For potential issues with CPU affinity, see the Resource Management documentation.
Prerequisites
Power off the virtual machine.
Procedure
- In the vSphere Client inventory, right-click the virtual machine and select Edit Settings.
- Click the Resources tab and select Advanced CPU.
- In the Scheduling Affinity panel, enter a comma-separated list of hyphenated processor ranges.
For example, “0,4-7” would indicate affinity with CPUs 0,4,5,6, and 7. Selecting all processors is identical to selecting no affinity. You must provide at least as many processor affinities as you have virtual CPUs.
- Click OK to save your changes and close the dialog box.
Change CPU Identification Mask Settings
CPU identification (CPU ID) masks control the CPU features visible to the virtual machine’s guest operating system. Masking or hiding CPU features can make a virtual machine widely available to ESXi hosts for migration. vCenter Server compares the CPU features available to a virtual machine with the CPU features of the destination host to determine whether to allow or disallow migration with vMotion.
For example, masking the AMD No eXecute (NX) and the Intel eXecute Disable (XD) bits prevents the virtual machine from using these features, but provides compatibility that allows you to migrate virtual machines to ESXi hosts that do not include this capability. When the NX/XD bit is visible to the guest operating system, the virtual machine can use this feature, but you can migrate the virtual machine only to hosts on which the feature is enabled.
NOTE You rarely need to change the CPU identification mask configuration settings. Almost all changes are made only to the NX/XD bit.
See the vCenter Server and Host Management documentation for detailed information about vMotion compatibility and CPU masks.
Prerequisites
Verify that you have access to the virtual machine in the vSphere Client inventory list.
Power off the virtual machine.
Procedure
- In the vSphere Client inventory, right-click the virtual machine and select Edit Settings.
- Click the Options tab and under Advanced, select CPUID Mask.
- In the CPU Identification Mask panel, select an NX flag option.
| Option | Description |
| Hide the NX/XD flag from guest | Increases vMotion compatibility.Hiding the NX/XD flag increases vMotion compatibility between hosts, butmight disable certain CPU security features. |
| Expose the NX/XD flag to guest | Keeps all CPU security features enabled. |
| Keep current Advanced settingvalues for the NX/XD flag | Uses the NX/XD flag settings specified in the CPU Identification Mask dialogbox. Enabled only when current settings specify something other than whatis specified in the other NX/XD flag options, for example, if the NX/XD flagbit setting varies with processor brand. |
-
(Optional) To edit mask values other than the NX bit or to set NX mask values to states other than “0” or “H”, click Advanced.
- Select the relevant tab.
- Click a row and edit the mask value.
To view an explanation of a values symbol, click Legend.
- Click OK to apply the changes and return to the Virtual Machine Properties dialog box.
- Select the relevant tab.
- Click OK to save your changes and close the dialog box.
Change CPU/MMU Virtualization Settings
ESXi can determine whether a virtual machine should use hardware support for virtualization. It makes this determination based on the processor type and the virtual machine. Overriding the automatic selection can provide better performance for some use cases.
Procedure
- In the vSphere Client inventory, right-click the virtual machine and select Edit Settings.
- Click the Options tab and under Advanced, select CPU/MMU Virtualization.
-
Select an instruction set.
- Automatic
- Use only software virtualization
- Use hardware support for CPU virtualization (VT/AMD-V) only
- Use hardware support for both CPU and MMU virtualization (VT/AMD-V and EPT/RVI)
- Automatic
- Click OK to save your changes and close the dialog box.
Tune Virtual Machine storage configurations
Official Documentation:
vSphere Virtual Machine Administration, Chapter 8 “Configuring Virtual Machines”, Section “Virtual Disk Configuration”, page 126.
Virtual Disk Configuration
You can add virtual disks and add more space to existing disks, even when the virtual machine is running.
You can set most of the virtual disk parameters during virtual machine creation or after you install the guest operating system.
You can store virtual machine data in a new virtual disk, an existing virtual disk, or a mapped SAN LUN. A virtual disk, which appears as a single hard disk to the guest operating system, is composed of one or more files on the host file system. You can copy or move virtual disks on the same hosts or between hosts.
For virtual machines running on an ESXi host, you can store the virtual machine data directly on a SAN LUN instead of storing it in a virtual disk file. This ability is useful if you are running applications in your virtual machines that must detect the physical characteristics of the storage device. Additionally, mapping a SAN LUN allows you to use existing SAN commands to manage storage for the disk.
When you map a LUN to a VMFS volume, vCenter Server creates a raw device mapping (RDM) file that points to the raw LUN. Encapsulating disk information in a file allows vCenter Server to lock the LUN so that only one virtual machine can write to it. This file has a .vmdk extension, but the file contains only disk information that describes the mapping to the LUN on the ESXi system. The actual data is stored on the LUN. You cannot deploy a virtual machine from a template and store its data on a LUN. You can store only its data in a virtual disk file.
About Virtual Disk Provisioning Policies
When you perform certain virtual machine management operations, such as creating a virtual disk, cloning a virtual machine to a template, or migrating a virtual machine, you can specify a provisioning policy for the virtual disk file.
NFS datastores with Hardware Acceleration and VMFS datastores support the following disk provisioning policies. On NFS datastores that do not support Hardware Acceleration, only thin format is available.
You can use Storage vMotion to transform virtual disks from one format to another.
| Thick Provision LazyZeroed | Creates a virtual disk in a default thick format. Space required for the virtualdisk is allocated when the virtual disk is created. Data remaining on thephysical device is not erased during creation, but is zeroed out on demand ata later time on first write from the virtual machine.Using the default flat virtual disk format does not zero out or eliminate the
possibility of recovering deleted files or restoring old data that might be present on this allocated space. You cannot convert a flat disk to a thin disk. |
| Thick Provision EagerZeroed | A type of thick virtual disk that supports clustering features such as FaultTolerance. Space required for the virtual disk is allocated at creation time. Incontrast to the flat format, the data remaining on the physical device is zeroedout when the virtual disk is created. It might take much longer to create disksin this format than to create other types of disks. |
| Thin Provision | Use this format to save storage space. For the thin disk, you provision as muchdatastore space as the disk would require based on the value that you enter forthe disk size. However, the thin disk starts small and at first, uses only as muchdatastore space as the disk needs for its initial operations.NOTE If a virtual disk supports clustering solutions such as Fault Tolerance,
do not make the disk thin. If the thin disk needs more space later, it can grow to its maximum capacity and occupy the entire datastore space provisioned to it. Also, you can manually convert the thin disk into a thick disk. |
Change the Virtual Disk Configuration
You can change the virtual device node, the size of the disk, and the persistence mode for virtual disk configuration for a virtual machine.
NOTE The Manage Paths feature for RDM disks is not available for virtual machines on legacy hosts running versions of ESX Server earlier than 3.0.
Procedure
- In the vSphere Client inventory, right-click the virtual machine and select Edit Settings.
- Click the Hardware tab and select the hard disk to modify.
The name of the disk file and the disk type (thick or thin) appear in the upper-right pane.
- Select a Virtual Device Node type from the drop-down menu.
- To change the size of the disk, enter a new value in the Provisioned Size text box.
- (Optional) To change the way disks are affected by snapshots, click Independent and select an option.
| Option | Description |
| Independent – Persistent | Disks in persistent mode behave like conventional disks on your physicalcomputer. All data written to a disk in persistent mode are writtenpermanently to the disk. |
| Independent – Nonpersistent | Changes to disks in nonpersistent mode are discarded when you power offor reset the virtual machine. With nonpersistent mode, you can restart thevirtual machine with a virtual disk in the same state every time. Changes tothe disk are written to and read from a redo log file that is deleted when youpower off or reset. |
- Click OK to save your changes and close the dialog box.
Add a Hard Disk to a Virtual Machine
When you add a hard disk to a virtual machine, you can create a new virtual disk, add an existing virtual disk, or add a mapped SAN LUN.
In most cases, you can accept the default device node. For a hard disk, a nondefault device node is useful to control the boot order or to have different SCSI controller types. For example, you might want to boot from an LSI Logic controller and use a Buslogic controller with bus sharing turned on to share a data disk with another virtual machine.
NOTE You cannot use migration with vMotion to migrate virtual machines that use raw disks for clustering purposes.
Procedure
- In the vSphere Client inventory, right-click the virtual machine and select Edit Settings.
- Click the Hardware tab and click Add.
- Select Hard Disk and click Next.
- Select the type of disk to use.
| Option | Action |
| Create a new virtual disk |
|
| Use an Existing Virtual Disk | Browse for the disk file path and click Next. |
| Raw Device Mappings |
|
- Accept the default or select a different virtual device node.
In most cases, you can accept the default device node. For a hard disk, a nondefault device node is useful to control the boot order or to have different SCSI controller types. For example, you might want to boot from an LSI Logic controller and share a data disk with another virtual machine using a BusLogic controller with bus sharing turned on.
- (Optional) To change the way disks are affected by snapshots, click Independent and select an option.
| Option | Description |
| Independent – Persistent | Disks in persistent mode behave like conventional disks on your physicalcomputer. All data written to a disk in persistent mode are writtenpermanently to the disk. |
| Independent – Nonpersistent | Changes to disks in nonpersistent mode are discarded when you power offor reset the virtual machine. With nonpersistent mode, you can restart thevirtual machine with a virtual disk in the same state every time. Changes tothe disk are written to and read from a redo log file that is deleted when youpower off or reset. |
- Click Next.
- Review the information and click Finish.
- Click OK to save your changes and close the dialog box.
Use Disk Shares to Prioritize Virtual Machines
You can change the disk resources for a virtual machine. If multiple virtual machines access the same VMFS datastore and the same logical unit number (LUN), use disk shares to prioritize the disk accesses from the virtual machines. Disk shares distinguish high-priority from low-priority virtual machines.
You can allocate the host disk’s I/O bandwidth to the virtual hard disks of a virtual machine. Disk I/O is a hostcentric resource so you cannot pool it across a cluster.
Shares is a value that represents the relative metric for controlling disk bandwidth to all virtual machines. The values are compared to the sum of all shares of all virtual machines on the server.
Disk shares are relevant only within a given ESXi host. The shares assigned to virtual machines on one host have no effect on virtual machines on other hosts.
You can select an IOP limit, which sets an upper bound for storage resources that are allocated to a virtual machine. IOPs are the number of I/O operations per second.
Procedure
- In the vSphere Client inventory, right-click the virtual machine and select Edit Settings.
- Click the Resources tab and select Disk.
- In the Resource Allocation panel, select the virtual hard disk to change.
-
Click the Shares column and change the value to allocate a number of shares of its disk bandwidth to the virtual machine.
- Low (500)
- Normal (1000)
- High (2000)
- Custom
When you select a shares symbolic value, the numeric value appears in the Shares Value column. You can select Custom to enter a user-defined shares value.
- Low (500)
- Click the Limit – IOPS column and enter the upper limit of storage resources to allocate to the virtual machine.
- Click OK to save your changes and close the dialog box.
Calculate available resources
Official Documentation:
vSphere Resource Management Guide,
Chapter 1 “Getting Started with Resource Management”, page 9 and
Chapter 2 “Configuring Resource Allocation Settings”, page 11
To understand resource management, you must be aware of its components, its goals, and how best to implement it in a cluster setting.
Resource allocation settings for a virtual machine (shares, reservation, and limit) are discussed, including how to set them and how to view them. Also, admission control, the process whereby resource allocation settings are validated against existing resources is explained.
Resource management is the allocation of resources from resource providers to resource consumers.
The need for resource management arises from the overcommitment of resources—that is, more demand than capacity and from the fact that demand and capacity vary over time. Resource management allows you to dynamically reallocate resources, so that you can more efficiently use available capacity.
Resource Types
Resources include CPU, memory, power, storage, and network resources.
NOTE ESXi manages network bandwidth and disk resources on a per-host basis, using network traffic shaping and a proportional share mechanism, respectively.
Resource Providers
Hosts and clusters, including datastore clusters, are providers of physical resources.
For hosts, available resources are the host’s hardware specification, minus the resources used by the virtualization software.
A cluster is a group of hosts. You can create a cluster using vSphere Client, and add multiple hosts to the cluster.
vCenter Server manages these hosts’ resources jointly: the cluster owns all of the CPU and memory of all hosts.
You can enable the cluster for joint load balancing or failover. See Chapter 9, “Creating a DRS Cluster,” on page 51 for more information.
A datastore cluster is a group of datastores. Like DRS clusters, you can create a datastore cluster using the vSphere Client, and add multiple datstores to the cluster. vCenter Server manages the datastore resources jointly. You can enable Storage DRS to balance I/O load and space utilization. See Chapter 11, “Creating a Datastore Cluster,” on page 77.
Resource Consumers
Virtual machines are resource consumers.
The default resource settings assigned during creation work well for most machines. You can later edit the virtual machine settings to allocate a share-based percentage of the total CPU, memory, and storage I/O of the resource provider or a guaranteed reservation of CPU and memory. When you power on that virtual machine, the server checks whether enough unreserved resources are available and allows power on only if there are enough resources. This process is called admission control.
A resource pool is a logical abstraction for flexible management of resources. Resource pools can be grouped into hierarchies and used to hierarchically partition available CPU and memory resources. Accordingly, resource pools can be considered both resource providers and consumers. They provide resources to child resource pools and virtual machines, but are also resource consumers because they consume their parents’ resources. See Chapter 8, “Managing Resource Pools,” on page 43.
ESXi hosts allocate each virtual machine a portion of the underlying hardware resources based on a number of factors:
- Total available resources for the ESXi host (or the cluster).
- Number of virtual machines powered on and resource usage by those virtual machines.
- Overhead required to manage the virtualization.
- Resource limits defined by the user.
Goals of Resource Management
When managing your resources, you should be aware of what your goals are.
In addition to resolving resource overcommitment, resource management can help you accomplish the following:
- Performance Isolation—prevent virtual machines from monopolizing resources and guarantee predictable service rates.
- Efficient Utilization—exploit undercommitted resources and overcommit with graceful degradation.
- Easy Administration—control the relative importance of virtual machines, provide flexible dynamic partitioning, and meet absolute service-level agreements.
Configuring Resource Allocation Settings
When available resource capacity does not meet the demands of the resource consumers (and virtualization overhead), administrators might need to customize the amount of resources that are allocated to virtual machines or to the resource pools in which they reside.
Use the resource allocation settings (shares, reservation, and limit) to determine the amount of CPU, memory, and storage resources provided for a virtual machine. In particular, administrators have several options for allocating resources.
- Reserve the physical resources of the host or cluster.
- Ensure that a certain amount of memory for a virtual machine is provided by the physical memory of the ESXi machine.
- Guarantee that a particular virtual machine is always allocated a higher percentage of the physical resources than other virtual machines.
- Set an upper bound on the resources that can be allocated to a virtual machine.
Resource Allocation Shares
Shares specify the relative importance of a virtual machine (or resource pool). If a virtual machine has twice as many shares of a resource as another virtual machine, it is entitled to consume twice as much of that resource when these two virtual machines are competing for resources.
Shares are typically specified as High, Normal, or Low and these values specify share values with a 4:2:1 ratio, respectively. You can also select Custom to assign a specific number of shares (which expresses a proportional weight) to each virtual machine.
Specifying shares makes sense only with regard to sibling virtual machines or resource pools, that is, virtual machines or resource pools with the same parent in the resource pool hierarchy. Siblings share resources according to their relative share values, bounded by the reservation and limit. When you assign shares to a virtual machine, you always specify the priority for that virtual machine relative to other powered-on virtual machines.
The following table shows the default CPU and memory share values for a virtual machine. For resource pools, the default CPU and memory share values are the same, but must be multiplied as if the resource pool were a virtual machine with four virtual CPUs and 16 GB of memory.
| Setting | CPU share values | Memory share values |
| High | 2000 shares per virtual CPU | 20 shares per megabyte of configured virtual machinememory. |
| Normal | 1000 shares per virtual CPU | 10 shares per megabyte of configured virtual machinememory. |
| Low | 500 shares per virtual CPU | 5 shares per megabyte of configured virtual machinememory. |
NOTE Virtual machines with more than one virtual CPU are called SMP (symmetric multiprocessing) virtual machines. ESXi supports up to 32 virtual CPUs per virtual machine.
The relative priority represented by each share changes when a new virtual machine is powered on. This affects all virtual machines in the same resource pool. All of the virtual machines have the same number of virtual CPUs. Consider the following examples.
- Two CPU-bound virtual machines run on a host with 8GHz of aggregate CPU capacity. Their CPU shares are set to Normal and get 4GHz each.
- A third CPU-bound virtual machine is powered on. Its CPU shares value is set to High, which means it should have twice as many shares as the machines set to Normal. The new virtual machine receives 4GHz and the two other machines get only 2GHz each. The same result occurs if the user specifies a custom share value of 2000 for the third virtual machine.
Resource Allocation Reservation
A reservation specifies the guaranteed minimum allocation for a virtual machine.
vCenter Server or ESXi allows you to power on a virtual machine only if there are enough unreserved resources to satisfy the reservation of the virtual machine. The server guarantees that amount even when the physical server is heavily loaded. The reservation is expressed in concrete units (megahertz or megabytes).
For example, assume you have 2GHz available and specify a reservation of 1GHz for VM1 and 1GHz for VM2.
Now each virtual machine is guaranteed to get 1GHz if it needs it. However, if VM1 is using only 500MHz, VM2 can use 1.5GHz.
Reservation defaults to 0. You can specify a reservation if you need to guarantee that the minimum required amounts of CPU or memory are always available for the virtual machine.
Resource Allocation Limit
Limit specifies an upper bound for CPU, memory, or storage I/O resources that can be allocated to a virtual machine.
A server can allocate more than the reservation to a virtual machine, but never allocates more than the limit, even if there are unused resources on the system. The limit is expressed in concrete units (megahertz, megabytes, or I/O operations per second).
CPU, memory, and storage I/O resource limits default to unlimited. When the memory limit is unlimited, the amount of memory configured for the virtual machine when it was created becomes its effective limit.
In most cases, it is not necessary to specify a limit. There are benefits and drawbacks:
- Benefits — Assigning a limit is useful if you start with a small number of virtual machines and want to manage user expectations. Performance deteriorates as you add more virtual machines. You can simulate having fewer resources available by specifying a limit.
- Drawbacks — You might waste idle resources if you specify a limit. The system does not allow virtual machines to use more resources than the limit, even when the system is underutilized and idle resources are available. Specify the limit only if you have good reasons for doing so.
Resource Allocation Settings Suggestions
Select resource allocation settings (shares, reservation, and limit) that are appropriate for your ESXi environment.
The following guidelines can help you achieve better performance for your virtual machines.
- If you expect frequent changes to the total available resources, use Shares to allocate resources fairly across virtual machines. If you use Shares, and you upgrade the host, for example, each virtual machine stays at the same priority (keeps the same number of shares) even though each share represents a larger amount of memory, CPU, or storage I/O resources.
- Use Reservation to specify the minimum acceptable amount of CPU or memory, not the amount you want to have available. The host assigns additional resources as available based on the number of shares, estimated demand, and the limit for your virtual machine. The amount of concrete resources represented by a reservation does not change when you change the environment, such as by adding or removing virtual machines.
- When specifying the reservations for virtual machines, do not commit all resources (plan to leave at least 10% unreserved). As you move closer to fully reserving all capacity in the system, it becomes increasingly difficult to make changes to reservations and to the resource pool hierarchy without violating admission control. In a DRS-enabled cluster, reservations that fully commit the capacity of the cluster or of individual hosts in the cluster can prevent DRS from migrating virtual machines between hosts.
Changing Resource Allocation Settings—Example
The following example illustrates how you can change resource allocation settings to improve virtual machine performance.
Assume that on an ESXi host, you have created two new virtual machines—one each for your QA (VM-QA) and Marketing (VM-Marketing) departments.
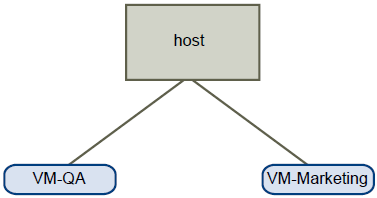
In the following example, assume that VM-QA is memory intensive and accordingly you want to change the resource allocation settings for the two virtual machines to:
- Specify that, when system memory is overcommitted, VM-QA can use twice as much memory and CPU as the Marketing virtual machine. Set the memory shares and CPU shares for VM-QA to High and for VM-Marketing set them to Normal.
- Ensure that the Marketing virtual machine has a certain amount of guaranteed CPU resources. You can do so using a reservation setting.
Admission Control
When you power on a virtual machine, the system checks the amount of CPU and memory resources that have not yet been reserved. Based on the available unreserved resources, the system determines whether it can guarantee the reservation for which the virtual machine is configured (if any). This process is called admission control.
If enough unreserved CPU and memory are available, or if there is no reservation, the virtual machine is powered on. Otherwise, an Insufficient Resources warning appears.
NOTE In addition to the user-specified memory reservation, for each virtual machine there is also an amount of overhead memory. This extra memory commitment is included in the admission control calculation.
When the vSphere DPM feature is enabled, hosts might be placed in standby mode (that is, powered off) to reduce power consumption. The unreserved resources provided by these hosts are considered available for admission control. If a virtual machine cannot be powered on without these resources, a recommendation to power on sufficient standby hosts is made.
Properly size a Virtual Machine based on application workload
Official Documentation:
There is no official documentation, but there are some good resources out there on the internet.
See the vSphere Virtual Machine Administration guide.
The Foglite blog, http://thefoglite.com/2012/07/30/properly-size-virtual-machines-and-clusters-for-optimal-drs-efficiency/
The article at the blog of The Foglite is a great resource.
Virtual Machine Sizing
When planning and designing a vSphere environment, it is crucial that an administrator pay special attention sizing VMs. A popular strategy when deploying a virtual infrastructure for the first time is to allocate resources equal to a VM’s physical counterpart or based on potential peak load. For example, in designing a virtual front-end web server, an administrator may unneccesarily allocate 4 GB of RAM and a quad-core CPU to the VM. The VM design mentioned above most likely far exceeds the day to day requirements of the VM. Multiple CPU cores should only be allocated to VMs as required by specific applications or workloads. A novice vSphere administrator may deploy multi-processor VMs with the best performance intentions in mind, but a VM should be limited to a single-core unless it’s running multi-threaded applications.
Not only does the aforementioned strategy waste valuable host and cluster resources, thereby reducing consolidation ratios, but it can also reduce the efficiency of DRS and its load balancing calculations. With the flexibility that vSphere provides, it’s best practice to start small when designing and deploying VMs. When a virtual machine is powered on, DRS is responsible for performing initial placement. During initial placement, DRS considers the “worst case scenario” for a VM. For example, when the web server described previously gets powered on, DRS will actively attempt to identify a host that can guarantee 4 GB of RAM to the VM. This is due to the fact that historical resource utilization statistics for the VM are unavailable. If DRS cannot find a cluster host able to accommodate the VM, it will be forced to “defragment” the cluster by moving other VMs around to account for the one being powered on. As such, VMs should be be sized based on their current workload. When performing an assessment of a physical environment as part of a vSphere migration, an administrator should leverage the resource utilization data from VMware Capacity Planner in allocating resources to VMs.
Cluster Sizing
Limiting the number of virtual machines in a cluster, reduces the number of load balancing calculations that the vCenter Server has to handle. There is a performance cost associated with vMotion operations, the main vehicle of DRS. However, from a DRS performance perspective, it is not advisable to have an abundance of small (2 to 3 host) clusters.
DRS performs load balancing calculations per cluster every five minutes by default. The greater the number of clusters, the more CPU strain will be caused on the vCenter Server as vCenter creates a DRS thread for each cluster it manages. Additionally, the more hosts that are present in a cluster, the more targets DRS has to work with in placing VMs.
When allocating hosts to a cluster, an administrator should leverage consistent server hardware as much as possible. It’s critical to ensure that cluster hosts have compatible CPUs, i.e. processors of the same vendor (Intel or AMD) and family. With the inclusion of Enhanced vMotion Compatibility (EVC), an administrator is able to configure clusters comprising hosts of varying (but same vendor and family) CPU generations. It’s considered best practice to enable EVC on a DRS cluster, but not advisable to configure clusters with hosts of vastly different performance levels and feature sets. So try to build your clusters on consistent hardware when possible.
Using consistent server hardware is particularly crucial if the cluster is enabled for both DRS and HA, when slot sizing comes into play. Slot sizes are calculated based on the highest CPU and memory reservations of the largest VMs in the cluster. The number of available slots is calculated by dividing the aggregate resources of the cluster by the slot size, but there is a caveat. Ideally, the number of slots available to accommodate a failover event should be consistent on each host as a means of maximizing available resources. But if a cluster contains hosts of varying capacity, valuable resources can be wasted. For example, assume an administrator deploys a three node HA/DRS cluster. In this cluster, the first host contains a total 32 GB of RAM and 24 GHz aggregate CPU. The second and third hosts both contain 64 GB of RAM and 32 GHz CPUs. Since HA calculations have to account for the worst case scenario, i.e. the largest host failing, the number of slots will be calculated based on the smallest host, the first one in this example. This greatly reduces the number of slots available and by association the potential consolidation ratio. For more information on the relationship between DRS and HA, check out a related post.
From a network perspective, 10 GB ethernet NICs are recommended as uplinks for the vMotion network. Having a big pipe for vMotion migrations will improve the overall performance of DRS. If 10 GB NICs can’t be dedicated to vMotion, then it’s advisable to implement Network I/O Control (NIOC) to logically guarantee adequate bandwidth through network resource pools for optimal migrations. If 1 GB NICs are still prevalent in your environment, there is a cool new option available. With the release of vSphere 5, VMware introduced Multi-Nic vMotion Support. Up to sixteen 1GbE (and four 10GbE NICs) can be dedicated to increase the throughput of the vMotion network.
Scale Up vs. Scale Out
The optimal number of hosts in a DRS cluster is debatable. In vSphere 5, the maximum number of hosts that are permitted to reside in a DRS enabled cluster is 32. This number has not changed since vSphere 4, although the maximum number of VMs per cluster has risen to 3000. Additionally, VM-specific maximums have also increased. Configuration maximums are impressive and good to know for a factoid VCP-type exam, but I’ve found little to no evidence to support that a 32-node cluster performs better from a DRS perspective than a 16-node cluster.
As pointed out in chapter 10 of VMware vSphere 5 Clustering Technical Deepdive, “vCenter servers in VDI environments experience more load due to the larger number of virtual machines and higher frequency of virtual machine power state changes, leading to more frequent invocation of DRS threads.” As such Duncan and Frank recommend separating VDI and server workloads for large environments, in an effort to improve overall vCenter and DRS performance.
Per VMware’s vMotion Best Practices, when configuring resource pools at the DRS cluster level, it is recommended to leave at least 10% of the cluster’s CPU capacity unreserved. “CPU reservations that fully commit the capacity of the cluster can prevent DRS from migrating virtual machines between hosts.”
Modify large memory page settings
Official Documentation:
See The Foglite blog for information, http://thefoglite.com/2012/08/17/modify-large-memory-page-settings/
ESXi 5 supports the use of large pages within a virtual machine’s guest O/S. There is a potential benefit to using large pages if the operating system and/or its applications are requesting them. A large page size is 2MB. Large pages require less frequent memory address lookups in the CPU translation lookaside buffer (TLB). Smaller pages require more frequent lookups and there is a potential benefit to using large pages to reduce this CPU overhead. Significant performance improvement may been seen on systems with MMU hardware assist CPUs.
Before you adjust your ESXi 5 large page host settings or for your applications and guest operating systems, you should understand the implications. Transparent Page Sharing (TPS) is generally always working to share memory pages. However, TPS does not share large pages. If you are exclusively using large memory pages, page sharing may not occur until times of contention. When contention does occur, those large pages will be broken down into the smaller page sizes. Memory will then be reclaimed by sharing those smaller pages, ballooning or swapping. When assigning 2MB large pages to a host when only a smaller 4KB page is needed, memory may become overcommitted more quickly.
Configuration of large pages in the operating system and the application are outside the scope of this article. See vendor documentation for details on how to adjust these settings. Below, you will find instructions on where to adjust large page settings for the ESXi 5 host to align with the needs of your guest operating system and applications.
1.From the vSphere client, open the Hosts and Clusters View (Ctrl + Shift + H)
2.Select a host
3.Select the configuration tab
4.Under Software, click Advanced Settings
5.Click Mem and adjust the setting according to the table below
6.Click OK when complete
| Setting | Description | Value |
| Mem.AllocGuestLargePage | Enables backing of guest large pages with host large pages. ReducesTLB misses and improves performance in server workloads that useguest large pages. 0=disable. | 1 |
| Mem.AllocUsePSharePoolandMem.AllocUseGuestPool | Reduces memory fragmentation by improving the probability ofbacking guest large pages with host large pages. If host memory isfragmented, the availability of host large pages is reduced. 0 =disable. | 15 |
| LPage.LPageDefragEnable | Enables large page defragmentation. 0 = disable. | 1 |
| LPage.LPageDefragRateVM | Maximum number of large page defragmentation attempts persecond per virtual machine. Accepted values range from 1 to 1024. | 32 |
| LPage.LPageDefragRateTotal | Maximum number of large page defragmentation attempts persecond. Accepted values range from 1 to 10240. | 256 |
| LPage.LPageAlwaysTryForNPT | Try to allocate large pages for nested page tables (called ‘RVI’ byAMD or ‘EPT’ by Intel). If you enable this option, all guest memoryis backed with large pages in machines that use nested page tables(for example, AMD Barcelona). If NPT is not available, only someportion of guest memory is backed with large pages. 0= disable. | 1 |
More information
Transparent Page Sharing (TPS) in hardware MMU systems. VMware KB1021095
Use of large pages can cause memory to be fully allocated. VMware KB1021896
Large Page Performance VMware PDF
Large Pages, Transparent Page Sharing and how they influence the consolidation ratio Gabe’s Virtual World
Understand appropriate use cases for CPU affinity
Official Documentation:
vSphere Resource Management Guide,
Chapter 3, CPU Virtualization Basics, Page 15 and also
Chapter 4, Administering CPU Resources, Page 17
CPU virtualization emphasizes performance and runs directly on the processor whenever possible. The underlying physical resources are used whenever possible and the virtualization layer runs instructions only as needed to make virtual machines operate as if they were running directly on a physical machine.
CPU virtualization is not the same thing as emulation. ESXi does not use emulation to run virtual CPUs. With emulation, all operations are run in software by an emulator. A software emulator allows programs to run on a computer system other than the one for which they were originally written. The emulator does this by emulating, or reproducing, the original computer’s behavior by accepting the same data or inputs and achieving the same results. Emulation provides portability and runs software designed for one platform across several platforms.
When CPU resources are overcommitted, the ESXi host time-slices the physical processors across all virtual machines so each virtual machine runs as if it has its specified number of virtual processors. When an ESXi host runs multiple virtual machines, it allocates to each virtual machine a share of the physical resources. With the default resource allocation settings, all virtual machines associated with the same host receive an equal share of CPU per virtual CPU. This means that a single-processor virtual machines is assigned only half of the resources of a dual-processor virtual machine.
Software-Based CPU Virtualization
With software-based CPU virtualization, the guest application code runs directly on the processor, while the guest privileged code is translated and the translated code executes on the processor.
The translated code is slightly larger and usually executes more slowly than the native version. As a result, guest programs, which have a small privileged code component, run with speeds very close to native. Programs with a significant privileged code component, such as system calls, traps, or page table updates can run slower in the virtualized environment.
Hardware-Assisted CPU Virtualization
Certain processors provide hardware assistance for CPU virtualization.
When using this assistance, the guest can use a separate mode of execution called guest mode. The guest code, whether application code or privileged code, runs in the guest mode. On certain events, the processor exits out of guest mode and enters root mode. The hypervisor executes in the root mode, determines the reason for the exit, takes any required actions, and restarts the guest in guest mode.
When you use hardware assistance for virtualization, there is no need to translate the code. As a result, system calls or trap-intensive workloads run very close to native speed. Some workloads, such as those involving updates to page tables, lead to a large number of exits from guest mode to root mode. Depending on the number of such exits and total time spent in exits, hardware-assisted CPU virtualization can speed up execution significantly.
Virtualization and Processor-Specific Behavior
Although VMware software virtualizes the CPU, the virtual machine detects the specific model of the processor on which it is running.
Processor models might differ in the CPU features they offer, and applications running in the virtual machine can make use of these features. Therefore, it is not possible to use vMotion® to migrate virtual machines between systems running on processors with different feature sets. You can avoid this restriction, in some cases, by using Enhanced vMotion Compatibility (EVC) with processors that support this feature. See the vCenter Server and Host Management documentation for more information.
Performance Implications of CPU Virtualization
CPU virtualization adds varying amounts of overhead depending on the workload and the type of virtualization used.
An application is CPU-bound if it spends most of its time executing instructions rather than waiting for external events such as user interaction, device input, or data retrieval. For such applications, the CPU virtualization overhead includes the additional instructions that must be executed. This overhead takes CPU processing time that the application itself can use. CPU virtualization overhead usually translates into a reduction in overall performance.
For applications that are not CPU-bound, CPU virtualization likely translates into an increase in CPU use. If spare CPU capacity is available to absorb the overhead, it can still deliver comparable performance in terms of overall throughput.
ESXi supports up to 32 virtual processors (CPUs) for each virtual machine.
NOTE Deploy single-threaded applications on uniprocessor virtual machines, instead of on SMP virtual machines, for the best performance and resource use. Single-threaded applications can take advantage only of a single CPU. Deploying such applications in dualprocessor virtual machines does not speed up the application. Instead, it causes the second virtual CPU to use physical resources that other virtual machines could otherwise use.
Administering CPU Resources
You can configure virtual machines with one or more virtual processors, each with its own set of registers and control structures.
When a virtual machine is scheduled, its virtual processors are scheduled to run on physical processors. The VMkernel Resource Manager schedules the virtual CPUs on physical CPUs, thereby managing the virtual machine’s access to physical CPU resources. ESXi supports virtual machines with up to 32 virtual CPUs.
Specifying CPU Configuration
You can specify CPU configuration to improve resource management. However, if you do not customize CPU configuration, the ESXi host uses defaults that work well in most situations.
You can specify CPU configuration in the following ways:
- Use the attributes and special features available through the vSphere Client. The vSphere Client graphical user interface (GUI) allows you to connect to the ESXi host or a vCenter Server system.
- Use advanced settings under certain circumstances.
- Use the vSphere SDK for scripted CPU allocation.
- Use hyperthreading.
Multicore Processors
Multicore processors provide many advantages for a host performing multitasking of virtual machines.
Intel and AMD have each developed processors which combine two or more processor cores into a single integrated circuit (often called a package or socket). VMware uses the term socket to describe a single package which can have one or more processor cores with one or more logical processors in each core.
A dual-core processor, for example, can provide almost double the performance of a single-core processor, by allowing two virtual CPUs to execute at the same time. Cores within the same processor are typically configured with a shared last-level cache used by all cores, potentially reducing the need to access slower main memory. A shared memory bus that connects a physical processor to main memory can limit performance of its logical processors if the virtual machines running on them are running memory-intensive workloads which compete for the same memory bus resources.
Each logical processor of each processor core can be used independently by the ESXi CPU scheduler to execute virtual machines, providing capabilities similar to SMP systems. For example, a two-way virtual machine can have its virtual processors running on logical processors that belong to the same core, or on logical processors on different physical cores.
The ESXi CPU scheduler can detect the processor topology and the relationships between processor cores and the logical processors on them. It uses this information to schedule virtual machines and optimize performance.
The ESXi CPU scheduler can interpret processor topology, including the relationship between sockets, cores, and logical processors. The scheduler uses topology information to optimize the placement of virtual CPUs onto different sockets to maximize overall cache utilization, and to improve cache affinity by minimizing virtual CPU migrations.
In undercommitted systems, the ESXi CPU scheduler spreads load across all sockets by default. This improves performance by maximizing the aggregate amount of cache available to the running virtual CPUs. As a result, the virtual CPUs of a single SMP virtual machine are spread across multiple sockets (unless each socket is also a NUMA node, in which case the NUMA scheduler restricts all the virtual CPUs of the virtual machine to reside on the same socket.)
In some cases, such as when an SMP virtual machine exhibits significant data sharing between its virtual CPUs, this default behavior might be sub-optimal. For such workloads, it can be beneficial to schedule all of the virtual CPUs on the same socket, with a shared last-level cache, even when the ESXi host is undercommitted. In such scenarios, you can override the default behavior of spreading virtual CPUs across packages by including the following configuration option in the virtual machine’s .vmx configuration file:
sched.cpu.vsmpConsolidate=”TRUE”.
Hyperthreading
Hyperthreading technology allows a single physical processor core to behave like two logical processors. The processor can run two independent applications at the same time. To avoid confusion between logical and physical processors, Intel refers to a physical processor as a socket, and the discussion in this chapter uses that terminology as well.
Intel Corporation developed hyperthreading technology to enhance the performance of its Pentium IV and Xeon processor lines. Hyperthreading technology allows a single processor core to execute two independent threads simultaneously.
While hyperthreading does not double the performance of a system, it can increase performance by better utilizing idle resources leading to greater throughput for certain important workload types. An application running on one logical processor of a busy core can expect slightly more than half of the throughput that it obtains while running alone on a non-hyperthreaded processor. Hyperthreading performance improvements are highly application-dependent, and some applications might see performance degradation with hyperthreading because many processor resources (such as the cache) are shared between logical processors.
NOTE On processors with Intel Hyper-Threading technology, each core can have two logical processors which share most of the core’s resources, such as memory caches and functional units. Such logical processors are usually called threads.
Many processors do not support hyperthreading and as a result have only one thread per core. For such processors, the number of cores also matches the number of logical processors. The following processors support hyperthreading and have two threads per core.
- Processors based on the Intel Xeon 5500 processor microarchitecture.
- Intel Pentium 4 (HT-enabled)
- Intel Pentium EE 840 (HT-enabled)
Hyperthreading and ESXi Hosts
A host that is enabled for hyperthreading should behave similarly to a host without hyperthreading. You might need to consider certain factors if you enable hyperthreading, however.
ESXi hosts manage processor time intelligently to guarantee that load is spread smoothly across processor cores in the system. Logical processors on the same core have consecutive CPU numbers, so that CPUs 0 and 1 are on the first core together, CPUs 2 and 3 are on the second core, and so on. Virtual machines are preferentially scheduled on two different cores rather than on two logical processors on the same core.
If there is no work for a logical processor, it is put into a halted state, which frees its execution resources and allows the virtual machine running on the other logical processor on the same core to use the full execution resources of the core. The VMware scheduler properly accounts for this halt time, and charges a virtual machine running with the full resources of a core more than a virtual machine running on a half core. This approach to processor management ensures that the server does not violate any of the standard ESXi resource allocation rules.
Consider your resource management needs before you enable CPU affinity on hosts using hyperthreading.
For example, if you bind a high priority virtual machine to CPU 0 and another high priority virtual machine to CPU 1, the two virtual machines have to share the same physical core. In this case, it can be impossible to meet the resource demands of these virtual machines. Ensure that any custom affinity settings make sense for a hyperthreaded system.
Enable Hyperthreading
To enable hyperthreading, you must first enable it in your system’s BIOS settings and then turn it on in the vSphere Client. Hyperthreading is enabled by default.Consult your system documentation to determine whether your CPU supports hyperthreading.
Set Hyperthreading Sharing Options for a Virtual Machine
You can specify how the virtual CPUs of a virtual machine can share physical cores on a hyperthreaded system.
Two virtual CPUs share a core if they are running on logical CPUs of the core at the same time. You can set this for individual virtual machines.
Hyperthreaded Core Sharing Options
You can set the hyperthreaded core sharing mode for a virtual machine using the vSphere Client.
| Option | Description |
| Any | The default for all virtual machines on a hyperthreaded system. The virtual CPUs of a virtual machinewith this setting can freely share cores with other virtual CPUs from this or any other virtual machineat any time. |
| None | Virtual CPUs of a virtual machine should not share cores with each other or with virtual CPUs fromother virtual machines. That is, each virtual CPU from this virtual machine should always get a wholecore to itself, with the other logical CPU on that core being placed into the halted state. |
| Internal | This option is similar to none. Virtual CPUs from this virtual machine cannot share cores with virtualCPUs from other virtual machines. They can share cores with the other virtual CPUs from the samevirtual machine.You can select this option only for SMP virtual machines. If applied to a uniprocessor virtual machine,the system changes this option to none. |
These options have no effect on fairness or CPU time allocation. Regardless of a virtual machine’s hyperthreading settings, it still receives CPU time proportional to its CPU shares, and constrained by its CPU reservation and CPU limit values.
For typical workloads, custom hyperthreading settings should not be necessary. The options can help in case of unusual workloads that interact badly with hyperthreading. For example, an application with cache thrashing problems might slow down an application sharing its physical core. You can place the virtual machine running the application in the none or internal hyperthreading status to isolate it from other virtual machines.
If a virtual CPU has hyperthreading constraints that do not allow it to share a core with another virtual CPU, the system might deschedule it when other virtual CPUs are entitled to consume processor time. Without the hyperthreading constraints, you can schedule both virtual CPUs on the same core.
The problem becomes worse on systems with a limited number of cores (per virtual machine). In such cases, there might be no core to which the virtual machine that is descheduled can be migrated. As a result, virtual machines with hyperthreading set to none or internal can experience performance degradation, especially on systems with a limited number of cores.
Quarantining
In certain rare circumstances, ESXi might detect that an application is interacting badly with the Pentium IV hyperthreading technology. (This does not apply to systems based on the Intel Xeon 5500 processor microarchitecture.) In such cases, quarantining, which is transparent to the user, might be necessary.
For example, certain types of self-modifying code can disrupt the normal behavior of the Pentium IV trace cache and can lead to substantial slowdowns (up to 90 percent) for an application sharing a core with the problematic code. In those cases, the ESXi host quarantines the virtual CPU running this code and places its virtual machine in the none or internal mode, as appropriate.
Using CPU Affinity
By specifying a CPU affinity setting for each virtual machine, you can restrict the assignment of virtual machines to a subset of the available processors in multiprocessor systems. By using this feature, you can assign each virtual machine to processors in the specified affinity set.
CPU affinity specifies virtual machine-to-processor placement constraints and is different from the relationship created by a VM-VM or VM-Host affinity rule, which specifies virtual machine-to-virtual machine host placement constraints.
In this context, the term CPU refers to a logical processor on a hyperthreaded system and refers to a core on a non-hyperthreaded system.
The CPU affinity setting for a virtual machine applies to all of the virtual CPUs associated with the virtual machine and to all other threads (also known as worlds) associated with the virtual machine. Such virtual machine threads perform processing required for emulating mouse, keyboard, screen, CD-ROM, and miscellaneous legacy devices.
In some cases, such as display-intensive workloads, significant communication might occur between the virtual CPUs and these other virtual machine threads. Performance might degrade if the virtual machine’s affinity setting prevents these additional threads from being scheduled concurrently with the virtual machine’s virtual CPUs. Examples of this include a uniprocessor virtual machine with affinity to a single CPU or a two-way SMP virtual machine with affinity to only two CPUs.
For the best performance, when you use manual affinity settings, VMware recommends that you include at least one additional physical CPU in the affinity setting to allow at least one of the virtual machine’s threads to be scheduled at the same time as its virtual CPUs. Examples of this include a uniprocessor virtual machine with affinity to at least two CPUs or a two-way SMP virtual machine with affinity to at least three CPUs.
Assign a Virtual Machine to a Specific Processor
Using CPU affinity, you can assign a virtual machine to a specific processor. This allows you to restrict the assignment of virtual machines to a specific available processor in multiprocessor systems.
Potential Issues with CPU Affinity
Before you use CPU affinity, you might need to consider certain issues.
Potential issues with CPU affinity include:
- For multiprocessor systems, ESXi systems perform automatic load balancing. Avoid manual specification of virtual machine affinity to improve the scheduler’s ability to balance load across processors.
- Affinity can interfere with the ESXi host’s ability to meet the reservation and shares specified for a virtual machine.
- Because CPU admission control does not consider affinity, a virtual machine with manual affinity settings might not always receive its full reservation.
Virtual machines that do not have manual affinity settings are not adversely affected by virtual machines with manual affinity settings.
- When you move a virtual machine from one host to another, affinity might no longer apply because the new host might have a different number of processors.
- The NUMA scheduler might not be able to manage a virtual machine that is already assigned to certain processors using affinity.
- Affinity can affect the host’s ability to schedule virtual machines on multicore or hyperthreaded processors to take full advantage of resources shared on such processors.
Host Power Management Policies
ESXi can take advantage of several power management features that the host hardware provides to adjust the trade-off between performance and power use. You can control how ESXi uses these features by selecting a
power management policy.
In general, selecting a high-performance policy provides more absolute performance, but at lower efficiency (performance per watt). Lower-power policies provide less absolute performance, but at higher efficiency. ESXi provides five power management policies. If the host does not support power management, or if the BIOS settings specify that the host operating system is not allowed to manage power, only the Not Supported policy is available.
You select a policy for a host using the vSphere Client. If you do not select a policy, ESXi uses Balanced by default.
| Power Management Policy | Description |
| Not supported | The host does not support any power management featuresor power management is not enabled in the BIOS. |
| High Performance | The VMkernel detects certain power management features,but will not use them unless the BIOS requests them forpower capping or thermal events. |
| Balanced (Default) | The VMkernel uses the available power managementfeatures conservatively to reduce host energy consumptionwith minimal compromise to performance. |
| Low Power | The VMkernel aggressively uses available powermanagement features to reduce host energy consumption atthe risk of lower performance. |
| Custom | The VMkernel bases its power management policy on thevalues of several advanced configuration parameters. Youcan set these parameters in the vSphere Client AdvancedSettings dialog box. |
When a CPU runs at lower frequency, it can also run at lower voltage, which saves power. This type of power management is typically called Dynamic Voltage and Frequency Scaling (DVFS). ESXi attempts to adjust CPU frequencies so that virtual machine performance is not affected.
When a CPU is idle, ESXi can take advantage of deep halt states (known as C-states). The deeper the C-state, the less power the CPU uses, but the longer it takes for the CPU to resume running. When a CPU becomes idle, ESXi applies an algorithm to predict how long it will be in an idle state and chooses an appropriate C-state to enter. In power management policies that do not use deep C-states, ESXi uses only the shallowest halt state (C1) for idle CPUs.
Configure alternate virtual machine swap locations
Official Documentation:
vSphere Resource Management Guide, Chapter 6, Administering Memory Resources, Section “Using Swap Files” Page 32.
You can specify the location of your swap file, reserve swap space when memory is overcommitted, and delete a swap file.
ESXi hosts use swapping to forcibly reclaim memory from a virtual machine when the vmmemctl driver is not available or is not responsive.
- It was never installed.
- It is explicitly disabled.
- It is not running (for example, while the guest operating system is booting).
- It is temporarily unable to reclaim memory quickly enough to satisfy current system demands.
- It is functioning properly, but maximum balloon size is reached.
Standard demand-paging techniques swap pages back in when the virtual machine needs them.
Swap File Location
By default, the swap file is created in the same location as the virtual machine’s configuration file.
A swap file is created by the ESXi host when a virtual machine is powered on. If this file cannot be created, the virtual machine cannot power on. Instead of accepting the default, you can also:
- Use per-virtual machine configuration options to change the datastore to another shared storage location.
- Use host-local swap, which allows you to specify a datastore stored locally on the host. This allows you to swap at a per-host level, saving space on the SAN. However, it can lead to a slight degradation in performance for vSphere vMotion because pages swapped to a local swap file on the source host must be transferred across the network to the destination host.
Enable Host-Local Swap for a DRS Cluster
Host-local swap allows you to specify a datastore stored locally on the host as the swap file location. You can enable host-local swap for a DRS cluster.
Procedure
- In the vSphere Client, right-click the cluster in the inventory and select Edit Settings.
- In the left pane of the cluster Settings dialog box, click Swapfile Location.
- Select the Store the swapfile in the datastore specified by the host option and click OK.
- In the vSphere Client inventory, select one of the hosts in the cluster and click the Configuration tab.
- Under Software, select Virtual Machine Swapfile Location.
- Select the local datastore to use and click OK.
- Repeat Step 4 through Step 6 for each host in the cluster.
Host-local swap is now enabled for the DRS cluster.
Enable Host-Local Swap for a Standalone Host
Host-local swap allows you to specify a datastore stored locally on the host as the swap file location. You can enable host-local swap for a standalone host.
Procedure
- In the vSphere Client, select the host in the inventory.
- Click the Configuration tab.
- Under Software, select Virtual Machine Swapfile Location.
- Select Store the swapfile in the swapfile datastore.
- Select a local datastore from the list and click OK.
Host-local swap is now enabled for the standalone host.
Swap Space and Memory Overcommitment
You must reserve swap space for any unreserved virtual machine memory (the difference between the reservation and the configured memory size) on per-virtual machine swap files.
This swap reservation is required to ensure that the ESXi host is able to preserve virtual machine memory under any circumstances. In practice, only a small fraction of the host-level swap space might be used.
If you are overcommitting memory with ESXi, to support the intra-guest swapping induced by ballooning, ensure that your guest operating systems also have sufficient swap space. This guest-level swap space must be greater than or equal to the difference between the virtual machine’s configured memory size and its Reservation.
CAUTION If memory is overcommitted, and the guest operating system is configured with insufficient swap space, the guest operating system in the virtual machine can fail.
To prevent virtual machine failure, increase the size of the swap space in your virtual machines.
- Windows guest operating systems— Windows operating systems refer to their swap space as paging files.
Some Windows operating systems try to increase the size of paging files automatically, if there is sufficient free disk space.
See your Microsoft Windows documentation or search the Windows help files for “paging files.” Follow the instructions for changing the size of the virtual memory paging file.
-
Linux guest operating system — Linux operating systems refer to their swap space as swap files. For information on increasing swap files, see the following Linux man pages:
- mkswap — Sets up a Linux swap area.
- swapon — Enables devices and files for paging and swapping.
- mkswap — Sets up a Linux swap area.
Guest operating systems with a lot of memory and small virtual disks (for example, a virtual machine with
8GB RAM and a 2GB virtual disk) are more susceptible to having insufficient swap space.
NOTE Do not store swap files on thin-provisioned LUNs. Running a virtual machine with a swap file that is stored on a thin-provisioned LUN can cause swap file growth failure, which can lead to termination of the virtual machine.
When you create a large swap file (for example, larger than 100GB), the amount of time it takes for the virtual machine to power on can increase significantly. To avoid this, set a high reservation for large virtual machines.
You can also place swap files on less costly storage using host-local swap files.
Delete Swap Files
If a host fails, and that host had running virtual machines that were using swap files, those swap files continue to exist and consume many gigabytes of disk space. You can delete the swap files to eliminate this problem.
Procedure
- Restart the virtual machine that was on the host that failed.
- Stop the virtual machine.
The swap file for the virtual machine is deleted.
Other exam notes
- The Saffageek VCAP5-DCA Objectives http://thesaffageek.co.uk/vcap5-dca-objectives/
- Paul Grevink The VCAP5-DCA diaries http://paulgrevink.wordpress.com/the-vcap5-dca-diaries/
- Edward Grigson VCAP5-DCA notes http://www.vexperienced.co.uk/vcap5-dca/
- Jason Langer VCAP5-DCA notes http://www.virtuallanger.com/vcap-dca-5/
- The Foglite VCAP5-DCA notes http://thefoglite.com/vcap-dca5-objective/
VMware vSphere official documentation
| VMware vSphere Basics Guide | html | epub | mobi | |
| vSphere Installation and Setup Guide | html | epub | mobi | |
| vSphere Upgrade Guide | html | epub | mobi | |
| vCenter Server and Host Management Guide | html | epub | mobi | |
| vSphere Virtual Machine Administration Guide | html | epub | mobi | |
| vSphere Host Profiles Guide | html | epub | mobi | |
| vSphere Networking Guide | html | epub | mobi | |
| vSphere Storage Guide | html | epub | mobi | |
| vSphere Security Guide | html | epub | mobi | |
| vSphere Resource Management Guide | html | epub | mobi | |
| vSphere Availability Guide | html | epub | mobi | |
| vSphere Monitoring and Performance Guide | html | epub | mobi | |
| vSphere Troubleshooting | html | epub | mobi | |
| VMware vSphere Examples and Scenarios Guide | html | epub | mobi |
Disclaimer.
The information in this article is provided “AS IS” with no warranties, and confers no rights. This article does not represent the thoughts, intentions, plans or strategies of my employer. It is solely my opinion.